Showing posts with label Recipes. Show all posts

Sunday, October 1, 2017

Cornbread Recipe

0 comments
This is cornbread that's so good you will want to write home to your southern mama about it. I love cornbread, but this one takes the cake. It has a texture more like a cross between cornbread and a biscuit. It has a great flavor and, if you add butter ... hold on to your bloomers.

My youngest made these last night with some taco leftovers. 

Ingredients

1 1/2 Cups Masa (yellow or white, doesn't matter)
1/2 Cup Flour
2 tsp Baking Powder
1 tsp Salt
3 Tbsp sugar (it would be quite tasty if you used brown or honey, but we just used sugar)
1 1/2 Cups Milk or half and half (we used milk)
2 Eggs
4 Tbsp butter, melted

Extra melted butter to drizzle over top (optional)

Directions

PREHEAT OVEN TO 425

1) In a large bowl combine all dry ingredients. Stir to mix.

2) In a small bowl whisk together all wet ingredients.

3) Combine wet and dry ingredients. Stir until you get a sticky dough.

4) Pour into 9" cast iron pan, cast iron muffin pan, or cast iron corn bread pan (you can use a non-cast iron pan just make sure to grease the bottom and sides very well)

5) Bake for 20 - 25 minutes or until toothpick stuck into middle comes out clean. It only took us 18 minutes.

6) Drizzle melted butter on top once you pull them out (optional but so yummy)

Wednesday, March 22, 2017

Tubie and Non-Tubie Foodie

0 comments
Food, as you know, is a big deal in this house. It seems I am always thinking about food! If it's not what's for supper, it's what will the kids eat to get their calorie goal met, to how much do I blend to make this work, to why it didn't work so I can tweak it next time. Needless to say, food is a major part of our lives. It gets tiring thinking about it, but it doesn't have to be hard. 

Photo Credit
On a good eating day we still struggle a lot. I need to be creative in order to help them succeed in meeting their calorie goal orally. One idea I use is the food tray. 

I pull out two ice cube trays and fill each spot with something they like. I did it this week on a particularly hard day. Here is what I have in each space from bottom to top:

First Picture (bottom to top)
Carrots
Pears
Strawberries
Gluten/Casein free cheese
Gluten free turkey
Plums 

 Second Picture (bottom to top)
Carrots
Pears
Strawberries
Gluten-free turkey
Plums
Blueberries


I added two skewers so the kids could either use them to eat their food or could make almost a kabob out of the different foods in any combination they wanted. For some reason removing the forks and adding skewers opens them up most of the time. 

If you don't have ice cube trays (which you can get them for $1 for 2 of them at Dollar General type stores), you can use other things such as muffin tins, muffin cups placed in an 8x8 baking dish, or anything small that you can find multiple of in your home. 

Of course there are days when even fun foods like this won't help them eat. On those days I pull out my Vitamix and begin blending. Sometimes I blend for the day. Sometimes I blend for a single meal. Sometimes I blend after they have attempted to eat and I use what's left of their meal. Each day is different in the dietary need they have. 

Blending foods can lead to some ... interesting (yeah, that's the word I will use) ... colors. But sometimes, some rare times, I get some pretty colors. Yesterday is the perfect example. 

Come on, PURPLE!! 


Ignore the extension that's yellow. One of the meds discolors them the second I use it. It's a clean extension.
So, how does one get a purple blend? It's pretty simple. Let me share the recipe.

Ingredients
  • 3 slices of gluten/casein free turkey lunch meat
  • 1 banana
  • 1 Cup almond milk
  • 1 handful blueberries
  • 1 carrot
Directions
  1. In a high powered blender (we use a Vitamix) add the almond milk and then the rest of your ingredients
  2. Start your blender on low speed, slowly building up speed as the ingredients begin to incorporate. 
  3. Turn on the high speed and blend for about 1 minute (blueberries can be grainy, this keeps you from having to strain your blend). 
  4. Turn off the high speed and slow back the speed down to the lowest setting. 
After blending this I got the notion in my head to taste it. I am not sure why, maybe it was the pretty color drawing me to it. I have to admit, if this was cold (it was slightly warm), I would drink it as a smoothie. It was delicious. It tasted like bananas with a touch of blueberry flavor. You couldn't taste anything else in the blend, not even the meat. Just a note in case you have a kiddo who would like a smoothie to take orally. 

Photo Credit


Friday, March 17, 2017

I am Dehydrated - Spinach!

0 comments
About 18 months ago, give or take, my husband bought me a dehydrator. We were thinking jerky of all kinds. Then I was scared to use it. Maybe I couldn't make jerky. Maybe it would taste horrible. Maybe, maybe, maybe. 

Then I discovered a group on Facebook all about dehydrating. Yep, there's a group for almost everything on Facebook. I read everyone's post about all the things they dehydrated and why. It fascinated me. 

I kept stalling. 

Then someone on my blended diet board (mostly for families who use a blended diet with a feeding tube), someone mentioned dehydrating for blends. I was hooked. It was time to figure this out. 

I had some spinach that I couldn't use in the amount of time it would be good, so I decided to start there. 

Let me share what I did. 

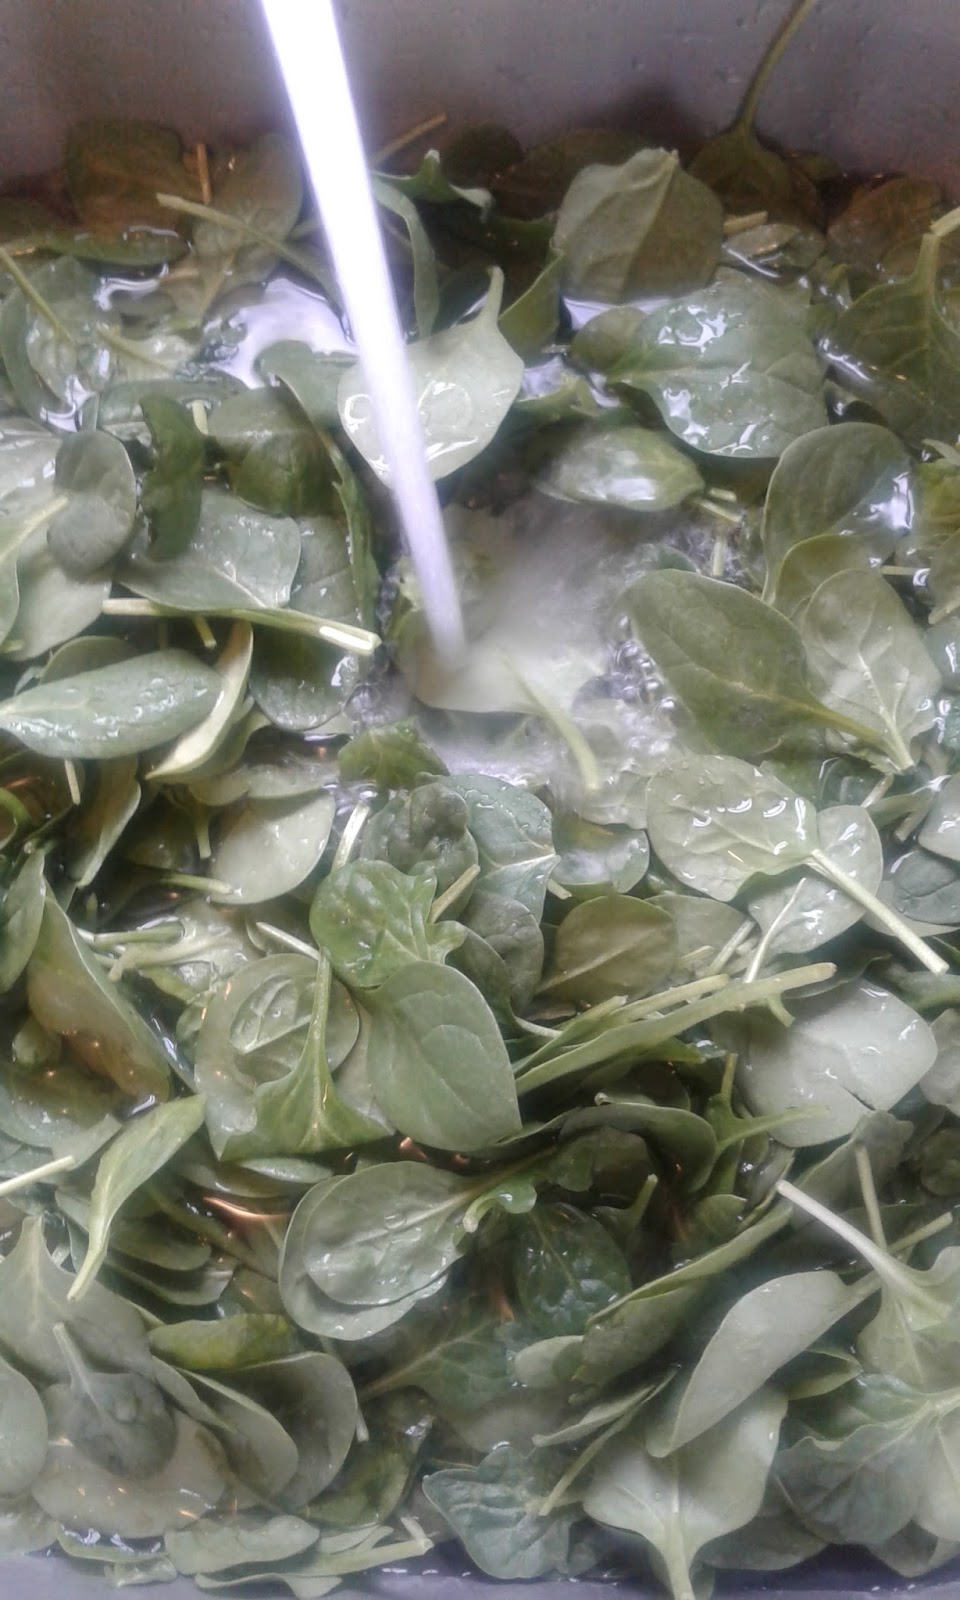
1) I washed the spinach in my sink in 1 part white vinegar and 3 parts water. I used room temp water and room temp spinach, though that's not really required (the temp). This helped kill off any bacteria and such. I let it soak for 10 minutes and then patted it dry. I let it air dry while I set everything up. 


2) Next, I cut parchment paper to the size of the trays (need to find silicone mats so I don't have to do that each time) and laid it down on the trays. I then laid spinach on all 6 trays. That took a while to do one leaf at a time. 


3) Once all 6 trays were filled, I stacked them on the machine (short side being used, there is a tall for thicker cut items), and set it for the temp I wanted. I did low and slow to help maintain as many nutrients as possible. 


4) I waited and waited and waited. Finally my spinach was done. I wanted it crispy for this project, so it took a bit longer. I pulled all the spinach out (this is all 6 trays full once it was dehydrated). I stood amazed at the tiny bit of spinach before me compared to what I put in the dehydrator. My husband came by and kept popping the leaves into his mouth eating them like chips. Yes, he has requested I do more of them without the next step involved so he can eat them all. 


5) Since I am going to use this in smoothies and for tube feeds, I need it powdered finely. So, out comes my Vitamix blender. Now, as much as I love my Vitamix, I have to admit, it's overkill for this job. A nice coffee grinder would work very well and would have less clean up (smaller canister). But, I don't have a coffee grinder or such, so I used Mr. Muscle. 


6) Blending! 


7) Pulverized into a fine powder. I then put the entire contents into a Ball jar. By the way, what you see here is the entire large box of organic spinach. This is a neat jar made by Ball and it's for spices. It's about half the height of a Ball jelly jar and the spinach powder is half of that. Yep, my kids are amazed at my awesome shrinking powers. 


Let me warn you. If you decide to start dehydrating, you will be addicted with your first batch. I am already setting up for my next batch. I am thinking fruit leather (think fruit roll ups without the junk). I am going to let the kids decide on the flavors. 

Want a good site for dehydrating information? I can set you up there, too. 

Tuesday, March 14, 2017

Healthy Unhealthy Milkshake

0 comments
My younger son is having a hard time getting his nutrition in the last week. Last night I had a melting down child on my hands because he didn't want a tube feed. "No tummy feed, Mom, just no." What's a Mom to do?

I don't know what most Moms do, but this Mom went into the kitchen and tried to do a quick brainstorm.

I ended up with a 600 calorie brainstorm Linus decided to name "Mom's Healthy Unhealthy Milkshake". Call it what you want kid, as long as you like it.

And he did ... a lot!

It's simple but not horrible for you, so I didn't mind giving it to him. Here's what I did:

Ingredients

1 Cup gluten/dairy free coconut ice cream in dark chocolate flavor
1 Cup organic spinach
1 medium - large organic carrot (broken into 3 or 4 pieces)
2 Tbsp MCT oil or any oil to the calorie total of 135 calories (many traditional oils like avocado/olive/etc have 120 calories/TBSP)
1/4 Cup plain almond milk (or any safe milk for your child)
4 - 6 ice cubes
safe chocolate sauce or chocolate chips (optional for extra chocolate flavor)

Directions

  • In a Vitamix blender (use what you have), put in the almond milk, oil, spinach, and carrot. 
  • Blend on high speed for 30 seconds until smooth
  • Add in ice cream
  • Blend on high until smooth
  • Add in ice cubes
  • Blend between low and high for about 30 - 45 seconds; just long enough to crush the ice cubes for a smooth milkshake texture
  • Add in extra chocolate (chips or sauce) if you desire more chocolate flavor
Afterward I realized I didn't want a big mess, so I put the milkshake in a Squeasy Reusable Pouch to keep in the mess and to make sure he didn't smell it just in case it didn't 100% smell like a chocolate shake. 
Sorry for the messy lid. When I said he liked it, he REALLY liked it. 

Sunday, February 12, 2017

Homemade Tortillas - Feingold Safe and TASTY

0 comments
My kids will eat almost anything if it's on a tortilla. However, we have a little one who is on the Feingold diet stage 1 and I am not sure he's ever getting off of stage 1. This means our food choices are a bit more limited. There ARE safe stage 1 tortillas, but not anywhere near the tiny town that we live. So, I decided to try and make them. How hard could they be?

They weren't hard at all, actually ... once I found a good recipe and tweaked it a bit. Now, tweaking is done, and I have an excellent tortilla recipe that's tasty, easy, and anyone can do.


Ingredients:

2 Cups all purpose flour
3/4 Cup water
3 Tbsp oil (we use safe olive oil)
1/2 tsp salt
More oil for cooking

Directions:


  • In a medium bowl combine flour and salt. Stir with mixing spoon.
  • Add in water, stir to combine.
  • Add oil, again stir to combine.
  • Sprinkle flour onto a bread board or clean counter top, put dough onto flour and knead (12 times or so).
  • Pull off enough dough for your tortilla. For smaller tortillas (think 6"), pull off the size of a medium meatball. For larger, pull of a larger amount. 
  • Use a floured rolling pin to roll out the ball of dough very thin making sure to sprinkle flour on it if it sticks to the pin or board/counter top.
  • On a non-stick (use safe non-stick, not teflon) electric skillet (or well seasoned cast iron) over medium heat, pour a bit of oil to lightly coat the surface and add your first tortilla. Cook it for about 1 minutes on each side. You can cook more than one at a time if you have room. 
  • Serve warm with your favorite toppings. 
Tips:

  • Make your tortillas thin! If they are thicker it won't be horrible, you will end up with a chalupa shell like you find at Taco Bell. But if you want a traditional tortilla, it has to be thinner than you might imagine as it will puff just a bit when you cook it. 
  • Oil is your friend. A light coating will make it slide and cook so evenly and well. 
  • Flour! You really don't want to roll this tortilla out to the perfect thinness only to have it stick and tear when you try and pull it off of your surface to cook. 
My picky kids couldn't get enough of these. My husband who usually says "it's alright" to almost anything he eats told me three times "these are a MUST DO AGAIN". 

Tuesday, January 17, 2017

Homemade Biscuits

0 comments
I have another recipe to share with you. This time we are looking at breakfast foods. Let me start this off by saying I am from the south. I was born here, raised here, and am raising my family here. Being from the south means we like biscuits. We eat them with eggs, with breakfast meats, with butter, with jelly, with gravy. I think we could eat biscuits as a side to pancakes. The point is, we like biscuits.

I have been a bad southerner for a while now and used, gasp, canned biscuits. Life was crazy. It was canned biscuits or going without a shower. That was my life.

Then we realized my younger son couldn't eat canned biscuits so we did without.

But, things slowed down enough for me to entertain biscuit making again and I had forgotten how fast and easy it was. It makes me hold my head down in shame that I thought I didn't have time for this tasty deliciousness.

I went online in the search for the perfect biscuit recipe. I found it in Paula Deen. That girl knows biscuits. And yes, I make them in my cast iron skillet like a good southern girl knows to do.

Let me start with my two tweaks and then I will share the recipe.

1) I have to add nearly a full cup of milk instead of 3/4 like the recipe calls for. You will need to play with this and feel your dough to figure out what you need. It just makes it a bit softer and yummier once it's cooked if I add a bit more.

2) This is a secret I figured out, quite by accident. I was rolling out my dough and it wasn't quite right, so I folded it over itself and tried again. Nope, still not to my liking, so I folded it over itself and tried again. Well, what I ended up with was biscuits with beautiful layers. If you have seen the canned biscuits called Grands, this is what it reminds me of. So, now I pat out my dough as to cut, fold it back on itself and do it again, and I do this about 4 - 5 times. I end up with tall layered biscuits.

On to the recipe!!

Paula Deen's Biscuits

Enjoy ... y'all!

Monday, January 16, 2017

Chicken Noodle Soup in an Instant Pot!

0 comments
I have an Instant Pot. I use it weekly. It's wonderful and has made cooking so much easier. Goodness, I can even cook from meat that has not been thawed on those days I look at 4pm on the clock and realize I forgot to defrost anything for supper. To say my Instant Pot has saved a meal more than once is an understatement.

But, somehow, I never thought of soup. Seriously, never. Well, until yesterday, that is. It was a cold, dreary, rainy day. It was a day that begged for soup. But, we weren't going to be home much since we had church and were going to spend time at my mother-in-law's home most of the afternoon.

I got home to frozen chicken and no idea what to do other than sandwiches. I was about to put a loaf of bread in the oven and the thought of warm yummy bread just sealed the deal.


I popped online to start my search and found a recipe that looked promising at Live Simply. I have never read her site before, but it looked promising. I pulled out my frozen chicken, cooked it in my Instant Pot (took 30 minutes from frozen) and off I went. Here's how I did it.

First I put my chicken, whole pieces, into the Instant Pot along with about 2 Cups of organic chicken broth.


I put the lid on, closed the pressure valve, and turned it on manual for 30 minutes.

Almost done!
Once it was completed, I did a quick release on the valve, pulled out the chicken, and poured the broth into a measuring cup to save for the recipe.

The best part is, if you have left over chicken that's already cooked, you cut 30 minutes of this recipe and take it down to about 10 minutes total (if you are including prep time).


Then I simply followed the recipe for Instant Pot Chicken Noodle Soup at Live Simply and, 10 minutes later, I had delicious, hot, fresh, very tasty soup for my family.


Oh, another neat thing ... I used the saute feature for the first time. I have never tried that before. Very cool, very easy, you should attempt it if you haven't yet.

Photo Credit

Monday, January 9, 2017

Yummy in the Tummy - Recipe

0 comments
I have been on the hunt for the perfect yeast roll for supper. Last night I found it. And, this morning, I share it with you. It's easy, delicious, soft, delicious, wonderful with butter, delicious, without butter, delicious, and one of my sons even had it with butter and a bit of garlic powder. Did I mention it's delicious?


Photo Credit
Quick Yeast Rolls Recipe

Monday, August 8, 2016

Last Week's Happenings - With Pics

0 comments
I always like posts that show fun end of week recaps of what happened in a blogger's home, so I thought I would do one this week.


We have chickens. They are finally laying consistently for us each week. But this one even surprised me. The egg on the right is a standard egg. It is the size of all of our eggs. The egg on the left is, what I can only guess, is from a serious overachiever. Yikes. Of course, my first response was OUCH! I am thinking it's safe to guess there is a double yolk in there. We will see tomorrow when I cook it.


I found a set of dry herb jars with lids by Ball.
Picture Source
I didn't know how to dry spices when I first got them, but they are a new favorite in our home. I found the easiest way for me to do this was to simply use kitchen string, tie up small bundles of herbs, hang them in the closet in our music room, and wait. I pull them out when they are dried, use my Pampered Chef chopper to chop them up to my desired texture, and put them in these cute shaker jars. You can't get much simpler than that.


The Sound of Music - oh my! I am a major fan. I always grew up wanting to be Maria. To have nuns sing about you in that disapproving but really tickled at you way, to have all those children come and sing in your room in the middle of the night, making clothes out of curtains, bravely moving forward in leaving your home country to forge a safe passage for your family ... how does it get any better? Oh, that's right, awesome music!

When my husband saw, The Von Trapp Family: A Life of Music he had to pick it up for me. We watched it one night. I will start with, don't get excited thinking it's a musical with great numbers you remember 30 years later. Yes, there is some singing, but it's a small part of the movie. While it's the path to getting them out, it's not the focus. This is the story from the oldest daughter, Agathe Von Trapp's, view point. It's worth the time to watch if you are a Sound of Music fan. But if you want to not be disappointed, don't go into it thinking it's the same as the original. But the scenery is gorgeous and is shows a different side of the story (and there are big changes in this story from the original).


Our oldest son has been saving up for a new Lego set. He decided on the Mystery Machine. I have to admit, it's my favorite set he has so far. 


I mean, come on, there's a Lego Shaggy and Scooby ... 


And Fred is wearing an orange ascot on his little Lego body. How can you not smile when you see this?

Ruh roh! I forgot to mention it even comes with a big sandwich for Scooby and Shaggy to fight over.


 I admit that I might be a bit biased, but how cute are these boots? You don't know much about our family, but let me fill you in a bit. My husband is country as they come. I have always called him by his nickname, "my plowboy". Our first date he walked up onto the deck of the restaurant in the big city we both lived in wearing his boots (boots that had actually worked on a ranch), Wrangler jeans, and white straw hat. Yeah, he had me at hello. So, how my sons don't live in cowboy boots is beyond me. We just haven't bought them any. Until this weekend. Our younger son needed some boots, actually both boys did. We normally buy them hiking type boots but our younger son spotted these and it was all she wrote. He had to have them. Sigh. I will say, he's just the cutest little cowboy I have ever seen.


 Last, but far from least (this one happened today, but I am including it in my weekly wrap up), is a little gift my husband bought for me. This might not seem romantic or very gift-like, but it sure lights me up! It's a mini fridge for our two kids blended tube feeds. It was set up on a very good day. Today, the day we set it up, our dietitian emailed us sharing our GI doctor's support for a blended diet for our sons g-tube feedings. Oh, we do it anyway, but never had their blessing no matter how successful our older son is on the diet. But it would be nice to have them on board. Our GI is very much on board. Our dietitian is not. But, I don't need her to agree. She works FOR our GI so she will have to help support us in this since our GI thinks it's a good idea. I would like her honest support, but I will take what I can get.

With two kids with blended diets, it takes up a lot of space. I have the food pre-blend and then the food in the bags post blend. Add in our normal food and foods the boys do actually take by mouth, and our fridge was running out of space in a big way. This solves that issue. It even has a small freezer space in it that will hold our freezer bricks for our insulated bags.

So, that's what we have been up to this week. We are gearing up to start school, have our younger son's post-op appointment with the surgeon to remove the bandaging from his new g-tube site, and then hopefully we will be on the standard 3 month appointment time frame after our next visit with the GI. Things are really moving forward. I will be glad to settle into our new normal without the disruptions.

Sunday, January 17, 2016

The PERFECT Hard Boiled Egg

0 comments
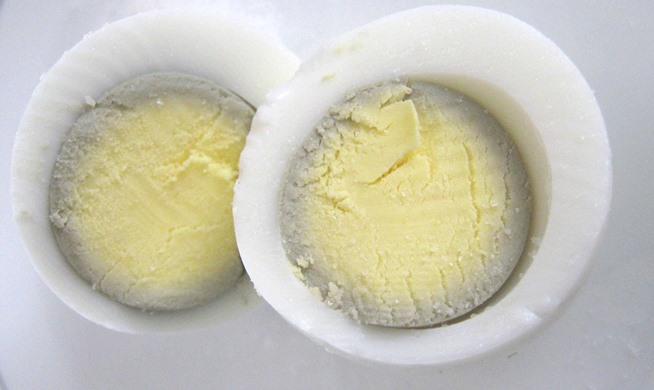
I have an egg problem. My problem is, I love eggs. However, hard boiled eggs always seem to come out funky. Either they have that gray ring around the yolk that shows they are overcooked ...
Or they are hard to peel ...
Or ... or ... or ...

But, I was in the mood for hard boiled eggs recently and decided, once again, to hit the internet for tips on how to do it. I have seen poking holes in the shell, fresh eggs, not fresh eggs, start in cold water, start in hot water, salt in the water, no salt in the water, the list goes on. None have ever worked for me.

Until this week. I finally found it. I found how to boil an egg that's perfectly cooked, peels like a dream (even if you put the egg in the refrigerator afterwards to eat at a later time), and has the perfect texture. And, ladies and gents, I am going to share it with you. Supposedly this idea came from the Amish, but don't quote me on that because I don't know if it's true.

Directions
I assume I can forego the ingredients list since it's eggs and water?


  • In a pot put cold water, enough to completely cover your eggs. 
  • Put the pot on a burner and turn it on high heat JUST until it boils. 
  • Boil the eggs for 2 minutes (no longer). 
  • Put a lid on the pot, turn off the heat, and let the eggs sit in the water for 11 minutes. Use a timer. 
  • Once the timer goes off, pour the water off the eggs, remove them from the pot, and put them in cold water. Tip, if you put them in about half ice and half water, this next step happens quickly. 
  • Keep them in the cold water until the egg is cool. 
  • Pull out and use as you wish. They will peel easily, be perfectly cooked, and will have a great texture. 

Monday, January 11, 2016

When Calories are Hard to Come By

0 comments
One of my sons has a very hard time getting enough calories throughout the day. There are many reasons for this issue. He doesn't feel hunger most times. He only eats because I put food in front of him and say it's mealtime or snack time. He also has a lot of sensory issues tied to foods in the way they smell, taste, or feel. This makes feeding him hard. I feel like my life is focused on food all day long. It got so bad that, no matter what therapies he had (and he had a lot for these issues), no matter which tricks we used (we tried them all), he couldn't get enough in each day to meet his calorie goal set by his dietitian. He ended up with a g-tube placed to help him get his calories in each day. This lead to a GJ-Tube because he was refluxing his formula. 
What we really wanted for our son was to eat like a typical kid. We wanted to have the complaints most parents did that they ate too much pizza or burgers and not enough vegetables. We had a son that loved veggies as a toddler and hated meat. That was our first steps into sensory issues. Through the years we have had to learn how to make calories count. We can't simply give him a meal. We have to count every calorie in every item on the plate and add very specific foods to make sure each item is as calorie rich as possible. 


But, it doesn't have to be hard. It really doesn't. Sometimes it's just thinking ahead. 

Here are a few examples:

Oils
Everyone says to cook foods with less oil. I disagree and so do our nutritionists and dietitians. In fact, they encourage it's use for calorie enhancement. But don't choose junk. Make sure you are getting healthy oils. 
  • Olive oil - 119 calories/Tbsp
  • Avocado oil - 124 calories/Tbsp
Avocado oil is on of my favorites. It has a wonderful light flavor and you don't taste like you are eating guacamole with everything. I use it in my sons eggs, for anything I cook that could be cooked in oil. If I bake, I try to use a high calorie oil (some have nearly 150 calories/Tbsp). Needless to say, I have quite a few oil choices in my pantry. 

More Oils
Coconut oil is very often overlooked. It's awesome. It's solid in the cold and liquid in warmer areas. You can use it as a spread (mix a bit with some honey and put it on toast, yum), in fat bombs (don't know fat bombs, you need to), and more. I mix it in candies I make to add fat to the chocolate, peanut butter, etc. I put it in anything I can because it hides so well. Oh, and don't leave our real coconut milk (not the kind that comes ready to drink, I am talking about the thick, white, creamy coconut milk you find in cans. You can use it in cakes (talk about rich) and other baked goods. You can also make coconut milk whipped cream which is delicious and easy to make. Two hints: Chill in fridge overnight instead of one hour and add 1 tsp of vanilla for a va-va-voom flavor. 

Nuts
Nuts have gotten a bad wrap over the past few years. But, most of us are not allergic to nuts and their use really helps kids get the fats they need in their diets, and also the calories. A good old fashioned peanut butter and jelly sandwich can be delicious, healthy, and a great calorie meal. Using average numbers for each item, here's the breakdown of calories
  • Organic Whole Grain Bread - 70 calories/slice (assuming 2 slices for a sandwich)
  • Organic creamy peanut butter - 190 calories/2 Tbsp
  • Fruit Spread - 30 calories/1 Tbsp (we use a chia spread with no pectin)
That's a total of 290 calories in a kid friendly meal. Add in a good dark veggie, a few chunks of cheese if you aren't dairy free (hello 114 calories/oz), and quality water to drink, and you have a nice calorie meal that most kids will eat. (not speaking of those of us with kids with real food issues) My son will now eat this meal. We have worked very hard to get this type of meal into him and it's a fairly typical meal in our family. For fun you can add in some sweet potato chips (114 calories/cup of sweet potato). They are very easy to make and quite tasty. 
Dairy
Kids like dairy. If you use dairy in your home, use this with many meals. It doesn't have to be fancy. Add a few cubes of raw milk cheese to the side of a plate for 100 calories. That's part of this whole thing, you don't have to be fancy. Kids usually aren't impressed with a lot of effort. They like simple meals they can identify, so work with them and save yourself grief. 

A note about dairy alternatives. We use dairy alternatives for our younger son. He can't have dairy of any kind. So, he gets almond milk, coconut milks, etc. However, these usually give between 45-80 calories/cup. So, if you are using them just for calories, they aren't a winner. 

There are so many more options out there. Make each calorie count when you have a kid who struggles in this area. Fat bombs are great because a kid just sees candy. You see healthy fats for their brain and good calories for their body. The old adage of K.I.S.S. - Keep It Simple Sweatheart (we don't use that other word in our home) is so true. Kids don't expect fine dining. They are cool with a sandwich. If that bores them, add faces with veggies and fruit. When you have a child that has food issues, you don't worry so much about the small things. You worry about nutrition and health. But, this will even work for picky eaters. Have fun, keep it simple, and help your child work through this. If you need therapies for them, get it. Feeding therapy can work wonders for many kids. For those who have picky eaters, remember that there are a few things you can't control in your kid's life. Food is one of them. They don't have to eat if they don't want to do it. So, try not to get into the food battle with them. Don't cater but don't fight. 

Thursday, December 10, 2015

Recipe - Lemonade

0 comments
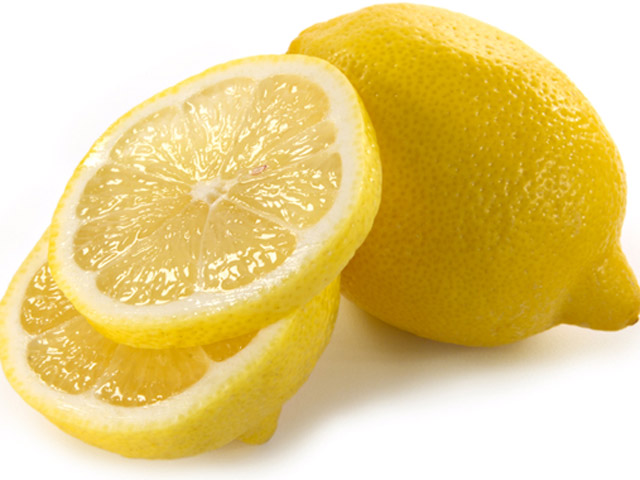
Yes, I have another recipe to share. Since we now use Bountiful Baskets we are getting some produce I sometimes don't think about buying, such as lemons.

Lemonade is delicious, a wonderful treat, a good way to get off of sodas, and super simple to make. Below are two quick methods to make delicious lemonade with three ingredients.

Lemonade - by hand

Ingredients

  • 3-5 lemons depending on size in order to get 1 Cup lemon juice
  • 5 Cups water, divided
  • 1 Cup sugar
Directions
  1. Put 1 Cup water and 1 Cup sugar into a small pot and put on medium high - high heat to bring to a boil. (making simple syrup)
  2. While that is heating up, roll lemons on a hard surface making sure to press down a bit to release the juice from the fruit. 
  3. Cut each lemon in half. Only do one or two at a time until you know how many lemons you will need. You don't want to waste them. 
  4. Squeeze each lemon half on a manual juicer until all juice is out the lemon. (see picture below)
  5. Pour lemon juice into pitcher big enough to hold 6 1/2 Cups (approximately) of liquid.
  6. Stir water and sugar until all sugar is dissolved. 
  7. Pour into pitcher and stir to mix. 
  8. Serve over ice or put in the refrigerator to chill before serving. 
I have one similar to this. 
Lemonade - by Vitamix


Ingredients

  • 3-5 lemons depending on size in order to get 1 Cup lemon juice
  • 5 Cups water, divided
  • 1 Cup sugar
Directions
  1. Put 1 Cup water and 1 Cup sugar into a small pot and put on medium high - high heat to bring to a boil. (making simple syrup)
  2. While that is heating up, peel the lemons and cut each one in half. I would start with 2 large lemons or 3 small ones and add to it once you see how much juice you will get. 
  3. Place the peeled lemon pieces into a Vitamix blender (or other high quality blender that can handle the load) and blend on high for 40 seconds (approximately) until you have a thick, creamy colored, juice.
  4. Pour lemon juice into pitcher big enough to hold 6 1/2 Cups (approximately) of liquid.
  5. Stir water and sugar until all sugar is dissolved. 
  6. Pour into pitcher and stir to mix. 
  7. Serve over ice or put in the refrigerator to chill before serving. 

Tuesday, December 8, 2015

Recipe - Garlic Watercress Eggs

0 comments
We purchase organic produce from Bountiful Baskets each week. I like that they have organic and non-organic baskets because my mother-in-law doesn't buy organic and this gives her the chance to get more veggies and fruit into her diet. If it's in her home, she won't let it go to waste. So, she will eat it. Never thought I would use that little trait to help her be healthier, but whatever it takes.

In my box last week I received watercress. First of all, I had no clue what it was. It was the only thing not labeled in my box. Second, the only thing I knew about watercress was those little sandwiches everyone seems to make fun of and no one I know has actually ever eaten.

I started with Google and discovered that it was, indeed, watercress. I had just guessed.
Good guess.

Then I asked my husband what we do with watercress. His response? Don't they make sandwiches out of it? OK, so that's really the only thing most people know about it. I am feeling much better.

I then went on the hunt for recipes. Obviously watercress and butter sandwiches wasn't going to cut it in my home. That's when I discovered a secret that only I didn't seem to know. Watercress is wild about eggs.

I decided to try some recipes this weekend and have come up with a favorite in our home. Check it out. I never would have thought I would like this, but figured I had nothing but a few eggs and some watercress to lose, so why not.

Our favorite recipe is below with a tweak that we discovered the second time we had them.
Garlic Watercress Eggs

  • 3 - 4 eggs
  • 1 clove garlic, diced very small, nearly minced
  • 1 small handful watercress
  • 1 Tbsp (approx) favorite oil for sauteing
  • Salt and pepper to taste (optional)
Directions:
  1. Put skillet over medium heat and add oil. Make sure to coat the bottom of the pan. 
  2. Add garlic and begin saute. 
  3. Just before done (it will not take long, 30 seconds or so) add in watercress and saute until just turns limp (very fast).
  4. Remove from pan and set aside
  5. Whisk eggs until they are a good scramble. They will pour off of a fork when they are very well combined. 
  6. Add to pan. Add salt and pepper to taste. Cook until done.
  7. Put the watercress and garlic you just sauteed back into the eggs and stir until combined. 
  8. Serve warm
Variation:
  • Instead of using oil, make bacon before you do anything else. 
  • Leave bacon grease in pan and follow steps 2 - 6 above. 
  • When adding in watercress and garlic, chop bacon and add it as well so that you now have bacon garlic watercress eggs. 
  • Drool! Oops, sorry, I mean serve warm. This would be incredible on a tortilla with a touch of cheese, salsa, and other toppings. 


Wednesday, December 2, 2015

Random Hodgepodge

3 comments
It's fitting that Joyce is having a random Hodgepodge this week considering the past few days (see my Catching Up post). So, here we go. Check out my answers and then head on over to Joyce's blog and have more bloggy fun.
1. Did you watch The Charlie Brown Christmas special Monday night? Who's your favorite Peanuts Character and why?

We didn't. I have it on DVD, so my kids are well versed in the movie. My favorite character is Linus. He reminds me of our younger son. If you knew our younger son, you would agree. His mongee (favorite blanket) is even the same color. I mean, down that our son's hair he looks and acts like Linus. (even the deep thinking)

1a. "Most psychiatrists agree that sitting in a pumpkin patch is excellent therapy for a troubled mind." - Linus
Would you agree?

I think getting outside and just being is VERY good therapy. I think a lot of issues with our health could be solved by just standing up and walking outside our front door and not coming back for quite a while. Homes are meant for shelter, not living most of your life. 

2. Describe a sound from childhood. What does this sound bring to mind?

Hmm, this one is harder. The only sound I think of is from a certain Christmas as a child. I remember laying in bed and hearing the chain in front of the fire place (do fireplaces still have those chain curtains). It was moving a lot and I thought Santa was there. I crept out of my room, tiptoed down the hall, and peeked into the living room. The only thing I saw was my younger brother looking at all of our gifts. I was so disappointed. But, only for about 20 seconds and then it hit me it was Christmas morning and we started yelling for our parents to get up so we could open our gifts. 

3. You've won a trip to a winter wonderland ... would that excite you? Which one of the following would you most want to experience (or which one would you dislike the least) - see Aurora Borealis in Norway, stay in Sweden's Ice Hotel, go dogsledding in Lapland Findland, take a winter wildlife safari in Yellowstone, or celebrate Winter Carnival in Quebec:

Wow, that's hard because all of them sound awesome. But, if I had to pick one I would choose to see the Aurora Borealis in Norway. I always wanted to see the Aurora Borealis and, hello, Norway. I mean, NORWAY!

4. Who or what keeps you humble. 

My ultimate answer is God. Without God nothing in this world would keep me humble. On a more direct level, it's my kids. Everytime I think I have it figured out with their medical issues I am side swiped and realize I wasn't quite fully right. Sigh. 

5. What part of preparing for Christmas do you like the most? Explain. 

I hope it's OK if I answer this with our Hanukkah celebration plans. We aren't doing Christmas this year. My favorite part is studying the history of Hanukkah with my kids. We spent yesterday reading about the war between the Macabees and Syrians. We talked about God's provision in our lives. We read the Bible about Christ being the light and in Revelation about us needing no sun in eternity because of Christ. 

I am also really enjoying learning the blessings for each night of Hanukkah. The first night there are three and the other nights there are 2. The extra one you do on the first night is the blessing Jewish people say on Sabbath. 

6. Gingerbread - yay or nay? Is making a gingerbread house part of your family holiday tradition?

I love the flavor of a good gingerbread cookie. However, we don't make houses because my kids are allergic to so many things in the cookies and I have never found a good recipe for a safe one. Think my kids will be permanently scarred? 

7. What's one thing you want to start, do, or complete before the calendar rolls into the new year.

I don't really have anything I want to do. I have accomplished a lot this year and am satisfied with how it's ending. If I need to say one thing, I would put that my kids would start sleeping (again, see my Catching Up post). If that were to happen this year would be double incredible. 

8. Insert your own random thought here. 

I ordered my first Bountiful Basket this week. My sister-in-law sent us pictures of her share from the last 2 weeks and the produce is beautiful. I like that I can pay and upcharge and get 100% organic produce. I also added on 20lbs of citrus (hmm, how can I save this the best way and keep it good) and a package that has everything you need to make homemade tamales (save the meat). We pick it up on Saturday. 

Here are my questions to anyone who reads this Hodgepodge:

1) How would you keep 20lbs of citrus from going bad? I mean, we will eat it, but it's 20lbs! 
2) Do you have a no fail recipe for tamales? My tamale package includes: Masa, corn husks, green chiles, jalepenos, dried red chiles, and tomatillos masa. 

Saturday, November 28, 2015

Waffle Recipe - Gluten, Dairy, Soy, Dye, and so much more free

0 comments
My kids like waffles. In our pre-special diet days, they would scarf them down like rabid wolves. However, with our special diets and the fact that waffle irons seem to either have teflon, aluminum or some other unsafe coating they weren't a part of our day (or they are cast iron and, well, GF bread on cast iron, yeah, that's a sticky situation waiting to happen).

My kids longed for waffles.

They begged for waffles.

They even tried bargaining for waffles.

Frozen waffles might be your thought. Yeah, just look at the label and find one that has no gluten, no soy, no dairy, no apples (apple juice is a big thing in gluten free foods), and so on. You won't find one, at least not at any Kroger, Walmart, local natural food store, Target, Whole Foods, Sprouts, and so on near us. I have read so many frozen waffle labels it's not even funny.

Enter this little beauty.
I never thought I would purchase an Oster kitchen appliance. They are not known for being high quality or very safe. But, I received so many recommendations on this exact model I decided to give it a try. It's the Oster Duraceramic Waffle Iron. There were two models. One is a basic one where you open the lid, pour in the batter, close the lid, and wait. The one in the picture was a bit nicer. It was similar to the irons you see in the dining areas of hotels with continental breakfasts. The picture above is in cook mode. If you flip it over you will see two lights (power and ready) and a temperature dial.

To use it you simply open the top lid, pour in your batter and spread it out (just helps for uniformity), close the lid and turn it clockwise. You wait until the light turns on, flip it back over, open it up, and you have a perfectly cooked waffle. No guessing on time or anything.

But, what about a recipe? That's the kicker here, isn't it. I have one. I tweaked a traditional waffle recipe for this and it worked beautifully.

This starts with the right flour. It used to be, in gluten-free cooking, that you had to get just the right mix of flours. You still do, but now the work has been done for us. I picked up one of the cup-for-cup flours for this recipe. I used Domata Gluten Free Recipe Ready Flour. You can use other cup-for-cup brands, but make sure it either has the corn starch in it or that you add it in this recipe (which I will show as optional assuming you are using this type of flour).

From here
Ingredients

  • 1 1/2 Cups all-purpose gluten-free flour (see picture above for description of exactly what I used)
  • 1/2 Cup cornstarch (you don't need this if you use a flour that already contains it, so read your label carefully)
  • 2 Tbsp cornmeal (I didn't use it in this recipe but the original did call for it. That's just a lot of corn product for my liking)
  • 1 Tbsp baking powder
  • 1 tsp salt
  • 3 large eggs, separated
  • 2 Tbsp sugar
  • 1 3/4 Cup almond milk (you can use rice but I like the thickness of Almond)
  • 1/2 tsp vanilla extract
  • 1/2 Cup dairy, soy, gluten free butter, melted (Earth Balance in the red container is excellent)
Directions
  1. In a large bowl, sift or whisk together flour, cornstarch, corn meal, baking powder, and salt to blend thoroughly; set aside.
  2. In a mixer bowl, beat egg whites until soft peaks form. 
  3. Add sugar; continue beating just until stiff peaks form; set aside.
  4. Whisk together egg yolks, milk, and vanilla. 

  5. Using spatula, stir milk mixture into flour mixture, blending just until dry ingredients are moistened (there should be small lumps, do not overmix - gluten free flour doesn't like too much mixing).
  6. Stir in melted butter. 
  7. FOLD in beaten egg whites until combined, Folding gives you that fluffy texture, don't overdo it.
  8. Pour batter onto a hot, greased (I use a little oil even though it's non-stick) waffle iron heated on Medium - Medium high heat.
Makes about 5 1/2 Cups and our average waffle took about 3/4 - 1 cup. 
If you like your waffles a bit crispier, put them on a wire cooling rack (make sure it's not teflon coated or an unsafe metal) and let it sit for a minute. 

Serve with warm organic maple syrup and watch your family eat them quickly. My husband, who doesn't have to eat allergy safe, said he would gladly eat those even if we didn't need to be gluten free. That's a big testament to the recipe. He's picky. 

Talk soon.

Friday, November 27, 2015

Holiday Treats - Recipes

0 comments
Allergies, intolerances, and more ... oh my! With Hanukkah, Thanksgiving, and New Year's Day coming up, treats are looming in front of us and so is the fact that our kids can't have any of it.

Yesterday I decided to whip up a few treats to see how my kids liked them and, honestly to see if I could do it. I thought I would share those recipes with you. I feel bad, again, calling them recipes since they are so simple. Oh, these are also a great way to add in items that you kids need but won't take by mouth. I am giving you the base recipes, but you wouldn't believe some of the things that I stuffed in these treats.

Peanut Butter Cups


Ingredients
  • Chocolate Chips (I used Enjoy Life Dairy, Gluten, Soy, Dye free)
  • Peanut butter (I used organic creamy peanut butter)
  • Organic coconut oil
  • Muffin cups
Directions
  1. Melt a large handful of chips/chunks over a medium low heat. 
  2. Once melted and smooth, pour a very thin layer in the bottom of a muffin cup. I used reusable silicone cups. 
  3. Put in freezer. 
  4. Wipe out pot or use another pot and put 3 rounded tablespoons into the small pot. Heat until smooth and melted. Add in 1 - 2 tsp coconut oil. Stir until incorporated and smooth. 
  5. After about 10 minutes your chocolate should be solid. Remove the cups and pour peanut butter over the chocolate. (the same amount or double the amount of chocolate, depending on how much you like peanut butter. We used double.)
  6. Put in freezer. 
  7. Melt another large handful of chips/chunks. Once melted and smooth, pour over the peanut butter layer you just finished that should now be solid. It won't be hard like the chocolate but solid. 
  8. Put these back in the freezer for a final setting. 
  9. Remove and put in a container (you can remove the muffin liners). 

Nutty Choco-corn


Ingredients

  • Popcorn
  • Chocolate (I used Enjoy Life like mentioned above)
  • Raw Almonds
  • Organic creamy peanut butter
  • Organic almond milk (you can use regular milk if you have no allergies)
Directions
  1. Melt two large handfuls of chocolate over a medium low heat. 
  2. In a bowl toss in 2 cups of pop corn. 
  3. Dip 10 almonds into the peanut butter so half of the nut is covered and you have the top half with nothing on it.
  4. Dip the almonds into the chocolate in the same manner so half is covered (where the peanut butter is) and the other half isn't. Lay the nuts on parchment paper and put in the freezer for a few minutes. 
  5. While the nuts are setting, add about 1 Tbsp peanut butter to the chocolate and stir until smooth. Add 1 - 2 Tbsp milk until the chocolate/peanut butter mix is thinned a bit. Stir until smooth. 
  6. Drizzle over the popcorn. Stir until about half coated. 
  7. Drop in the nuts and stir to gently toss. 
  8. Pop a movie into the BluRay player and have a fun evening on the sofa. 

Simple Chocolate Bars

Ingredients
  • Chocolate (see above)
  • Organic peanut butter
  • Almond milk (I used a specialty formula my son uses to add nutrition to this bar instead of milk)
  • Add ins (optional - rice crispy type cereal, marshmallows, nuts, etc)
Directions
  1. Melt 2 handfuls of chocolate over medium low heat
  2. Stir in 1 heaping Tbsp of peanut butter
  3. Pour in 1 - 2 Tbsp milk until smooth
  4. Lay out parchment paper and pour/spoon onto paper in a thin candy bar thick piece. (drop in add ins at this point if you want to use them)
  5. Put in freezer until solid. 
  6. Cut with a sharp knife into bar sized pieces
I had a little chocolate left over from some of these and decided to make another little treat. I bought some safe maraschino cherries (yes, safe. No dyes, HFCS, soy, etc). I dipped them in plain melted chocolate(keep the stem on as a handle). Set them on parchment paper or a few in a muffin cup and set in freezer or fridge to set the chocolate.

Talk soon. 
 

Random Acts of Boyhood Copyright © 2012 Design by Ipietoon Blogger Template