I am going to share the parts with their part numbers (for those parts that have them) and then how I put it together. This will allow for about 250ml of formula or blended food to be used. I am currently looking at 3 or 4 larger bottles that will hold 600ml or more for longer feeds. But, I haven't received those or tested them, so I am waiting before I share it as I don't want anyone to waste any money on useless parts.
There will be a lot of pictures in this post as I don't want confusion from merely writing names or descriptions. Forgive the quality of the pictures, I used my cell phone for speed.
Supplies
First I purchased an insulated beer bottle koozie. I found this at Walmart and it cost $1.00. There were a few color choices if your kids would like to choose a color. Make sure it's the type with a zipper.


Then I purchased safe baby bottles. It needs to be a narrow neck, not the wide moth variety. You can also find bottles this same size that aren't baby bottles per se, but you must make sure the threading starts at the top. Many have a gap of smooth glass and then threads. That will not work. Amazon is a great source for lead free glass baby bottles. This is just a sample. You can use Dr. Brown's glass bottles, Lifefactory glass bottles, and more. You just need to make sure it's the narrow/standard mouth.


Now, this is where specialized pieces come into play. You will need to purchase a Kendall Kangaroo Safety Screw Spike Adaptor Cap. I purchased mine from ADW Diabetes. You don't need a prescription. They cost $1.92/cap. You can buy singles, multiples of 4, and boxes of 30. Your DME can also most likely get these if your insurance covers your feeding supplies as they are feeding equipment.
ADW's part number is: 61775762
Kendall's model number is: 775762

This exact design is important. Notice the tall opening port and the small hole? The port is for the next part I will tell you about. The small hole is to allow air pressure to normalize for flow of food.
Last is the tubing. I purchased an Enteralite Spike Right with Proximal End Connector. You can get this two different places without a prescription. ADW has them for $3.39/tube and Vitality has them for $4.20/tube.
The pictures are misleading. You will see bags, tubing, etc in the picture but you will only get the Spike Right set, so no fears.
Part number for Vitality and ADW is: 12223318


This is what the end looks like. You will see why this is important in a minute.
So, those are the parts we need. Total, for one complete set up, I paid $8.62. However all but $3.39 of that is reusable so you wouldn't pay that each day. And, $6.12 of that is medical equipment that you could go through your DME for, which should be covered by insurance. The bottles and koozie are reusable for an infinite amount of time and they account for $2.50 of the total cost.
Now, let's move on to how to set this up so we can actually do a feed for our child.
Directions
It's time to put this all together. This is very simple and very quick.
- Remove the lid from your baby bottle. I tossed mine as I will never use them since we are far past the baby stage in our home. Pour your formula/food into the bottle.
- Screw on the purple spike cap and close it tightly.

- Next, place the spike end of the tubing into the open port (the tallest and only open one on the purple cap). Make sure to screw it on tightly as well.


- Put the bottle into the insulated koozie. Zip it up and you are done.


This is where you have some choices and decisions to make. You can use a backpack if you have one and slip the insulated covered bottle into the bag holder. I have a Kendall Joey backpack (not sure why the DME gave me that since we use an Enteralite, but it works great). It has a clip like the picture below. Fully extended (it's adjustable), it holds this contraption I made above perfectly and it doesn't move or slip.
 |
| From here |
- Sew it on by hand or machine.
- Use a snap setter to easily put snaps on each piece and attach it that way.
- Use grommets to attach the two items.
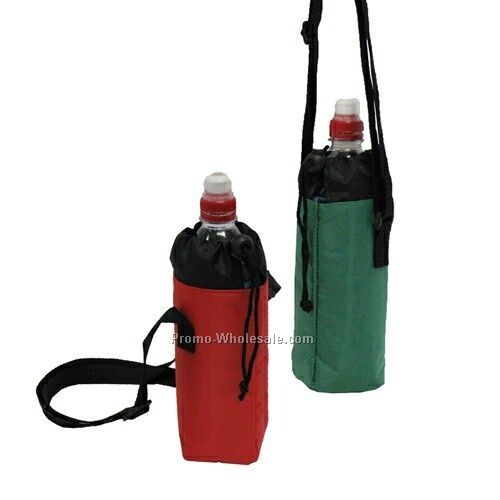
Another idea is to make a bag. I am going to be making two bags for my son. One will hold this smaller bottle and one will hold the larger one. They will be similar to this one ...
 |
| From here |
Or this one ...
 |
| From here |
But it will be a perfect fit for the actual bottles I use. I will make it open at the top and just a hole at the bottom so the opening doesn't open up in the middle of a feed and the bottle drop out.
My husband has an insulated water bottle holder that is an option as well if you wanted to simply purchase a ready made item. It is very similar to the picture below, is insulated, and has a handle. You could simply tack the handle so it ends up at the other end in under 5 minutes. You can find them online or at any camping supply store (where my husband got his).
 |
| From here |
My son was my final test subject. After a few well worded jokes from him, I asked him his thoughts about it, did he like it, did it make the feed feel any different, etc. His end result was two tubie thumbs up.
The flow rate is the same and wasn't messed up with the different container. Clean up was a breeze. You know, let me share that with you as well.
Clean Up
- Unscrew spike end of tubing from cap.
- Unscrew cap.
- Empty and wash out bottle using warm soapy water.
- Wash out cap using a rag or a gentle dish brush using warm soapy water. Air dry.
- While squeezing the flow part of the tubing (the part of the tubing cassette that you squeeze to prime it), hold the spike end under warm water. It will clean out the tubing for you in seconds. After it is running clear water, stop the water and continue to prime it so all the water leaves the tubing. Air dry.
I use what we call the tubie octopus for all of my feeding tube parts that need to air dry. (extensions, tubing, caps, etc.). It's actually a baby bottle drying rack. It looks similar to the picture below. The cup in the center is perfect for 10ml and 60ml syringes, I drape tubing over the arms, can set caps and such on the grid at the bottom. It works perfectly.

That's it. That's our new feeding system. Once I test the larger bottles I will make a second post sharing the name and vendor of those. If you find a larger toxin free glass bottle with the proper size opening that holds 600ml or more before I post, please feel free to share it in the comments and I will add it to my research and future post.
If you want to join our Toxin-Free Tubie group, please feel free to request membership on the board. We would love to have you.
If you want to join our Toxin-Free Tubie group, please feel free to request membership on the board. We would love to have you.


I'm trying to find you fb page and can't, even following the link
ReplyDeletehttps://www.facebook.com/Random-Acts-of-Boyhood-1697226913871629/?ref=bookmarks
DeleteSee if the direct link helps and I will check the link on here. Thank you for this. Sorry, your message went to spam so I didn't even see it. UGH.